Away from the physical classroom, it’s still possible to facilitate discussions within small groups in Moodle as opposed to your entire cohort. You might want each group to discuss the same topic but within their small group or you may choose to assign a different topic to each group. Either way, you may also want to eventually share these small-group discussions with the whole cohort.
Setting up group discussions
This article assumes that groups are already defined within your course and that you are familiar with adding a Forum activity in Moodle. If groups are not already created in your course then the article, ‘How do I add students to groups?‘ offers guidance.
Configure Forum settings
The first thing to do is to configure the ‘Group mode’ and ‘Groupings’ settings of the Forum itself. You will need to:
- With editing turned on, locate the Forum activity in your course and click on Edit > Edit settings.
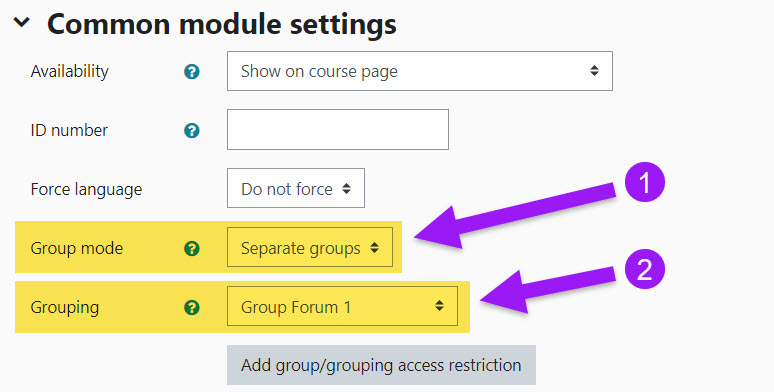
- Scroll down the settings page and click on the Common Module Settings section to expand it.
- Set the ‘Group mode’ to be Separate groups and select your ‘Grouping’ from the the drop-down list (the Grouping will determine which Groups can engage with this activity)
For more information about Groupings, please see How do I create Groupings in a Moodle course?.
- Click on Save and display.
Adding a new group discussion
Once saved, when you go into the Forum activity as a teacher, you will now notice a drop-down list showing the groups in your course. To add a new discussion:
- Select a group from the ‘Separate groups’ drop-down list.
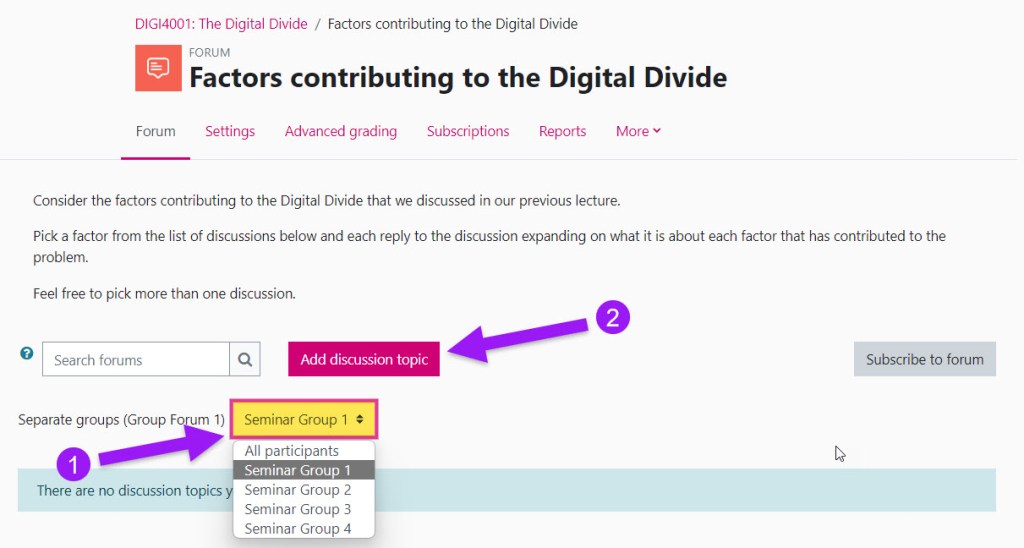
- Click on Add a new discussion.
Option 1: Create a different discussion for each group
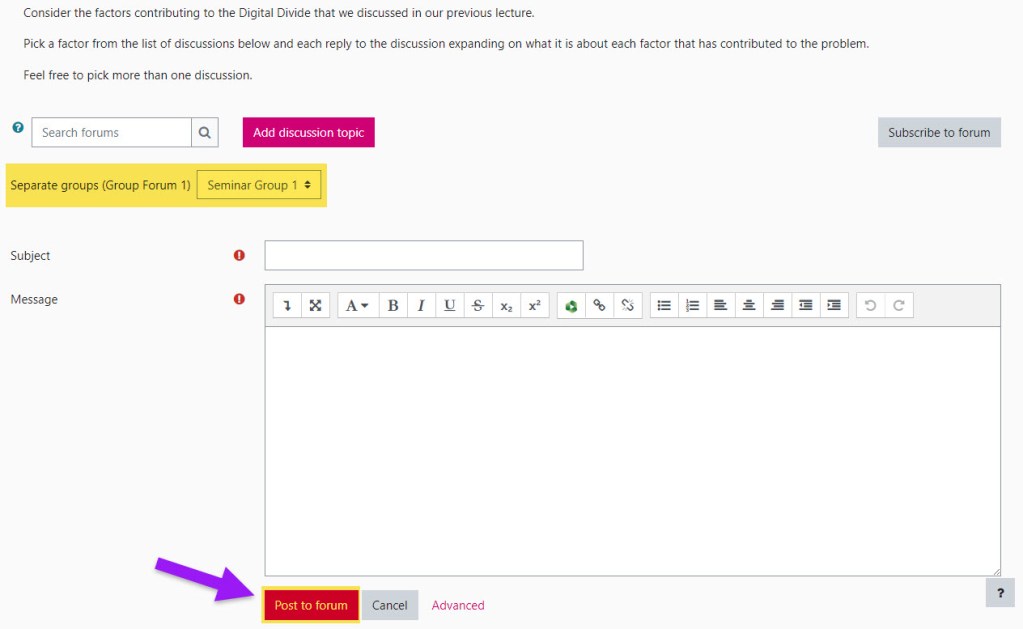
You will notice the selected group at the top of the ‘Add a new discussion page’. If you want this topic to be for this group and this group only then:
- Enter a Subject and Message.
- Click on Post to forum.
- Repeat by selecting a different group and adding a new discussion for as many groups as required.
Option 2: Create the same discussion for each group
You will notice the selected group at the top of the ‘Add a new discussion page’. If you want this topic to be discussed by all the students but within their groups:
- Enter a Subject and Message.
- Click on Advanced.

- Scroll down and select Post a copy to all groups.
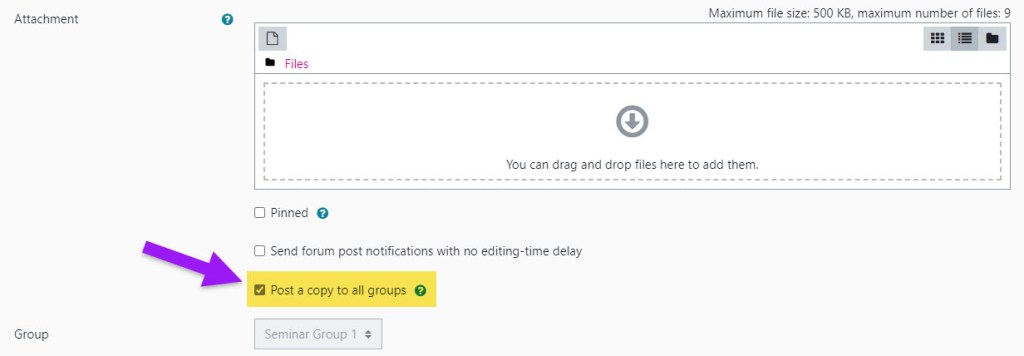
- Click on Post to forum.
What does the teacher see? (Separate groups)
Once discussions have been added, the teacher can monitor all these discussions from the main Forum page by selecting All participants from the ‘Separate groups’ drop-down list; alternatively, the teacher can filter by selecting a specific group from the list:

What does the student see? (Separate groups)
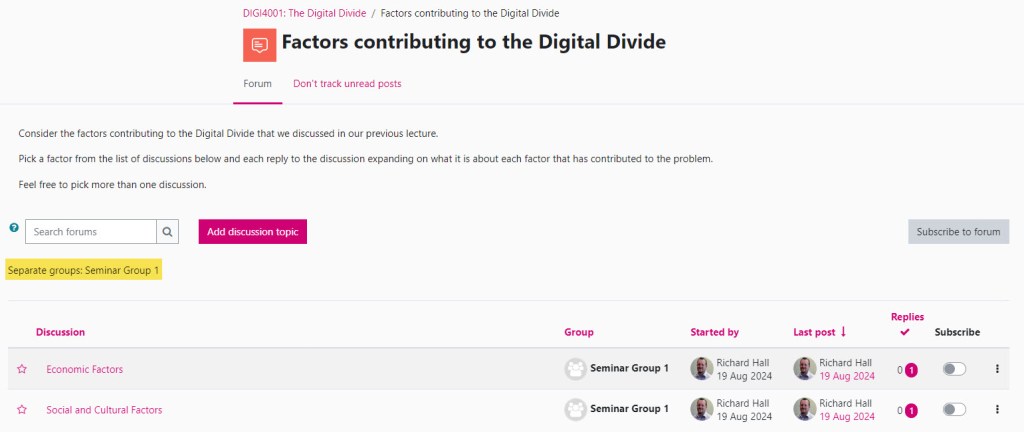
When the student accesses the Forum within the course, the student is only presented with the discussions for his/her group. In this example, the student is a member of ‘Seminar group 1’ and so is only seeing the ‘Seminar group 1’ discussions:
Sharing small group discussions with all students
You may decide (perhaps after the small group discussions have been active for a certain period of time) that you want all the students to be able to benefit from viewing what has been discussed in other groups.
Configure Forum settings
- With editing turned on, from your course page, locate the Forum activity and select Edit > Edit settings.
- Scroll down and click on the Common module settings section.
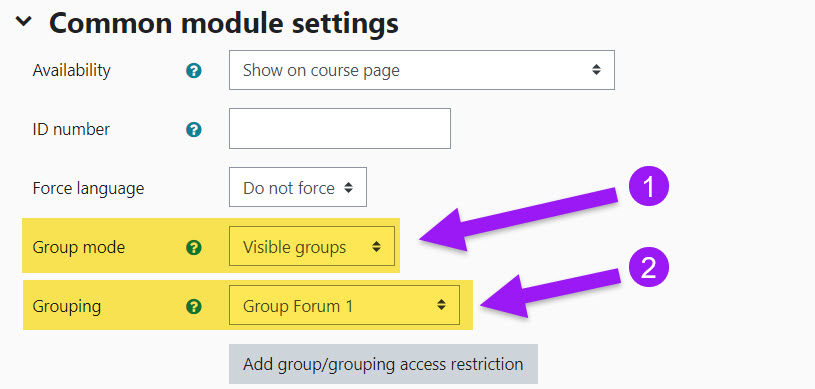
- Set the ‘Group mode’ to be Visible groups and select your ‘Grouping’ from the the drop-down list (the Grouping will determine which Groups can engage with this activity)
For more information about Groupings, please see How do I create Groupings in a Moodle course?.
- Click on Save and display.
What does the student see? (Visible groups)
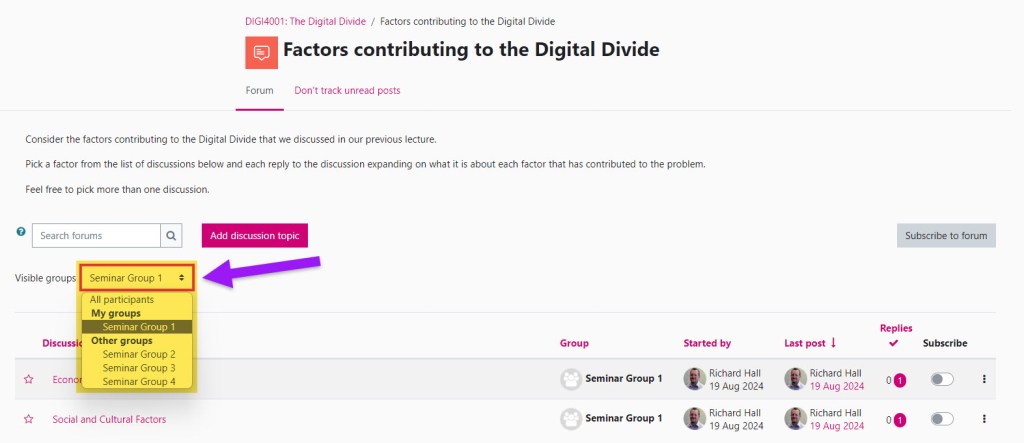
When the student next accesses the Forum, they will see the discussion(s) for their group but will also have the ability to choose another group from the ‘Visible groups’ drop-down list to view other discussions outside of their own group.
Students can only reply to discussions assigned to their own group; for group discussions for which a student is not a member, the student will only be able to view the discussions.