The waiting room is a feature in Zoom that allows teachers (who are hosts) to control when students will be admitted into a synchronous teaching session.
Uses for the waiting room
- You may have a confidential conversation with your co-teachers in the meeting before the session starts, while students are in the waiting room.
- You can enable the waiting room in Zoom meetings that have been set up for office hours. While you are talking to a student, other students can wait in the waiting room. They won’t be able to hear your conversation with the student, while they are in the waiting room.
- You can display short messages to students just before the lecture starts, e.g. to enable their microphones/webcams, open the respective Moodle page for the course.
How to enable the waiting room for all meetings
The waiting room is a setting in your Brookes Zoom account that can be enabled and apply to all meetings by default, but can be bypassed when scheduling individual meetings. For example, you can enable the waiting room and include a message for your students before the lecture starts, but you can disable it when scheduling a professional meeting with your colleagues.
To enable the waiting room:
- Go to brookes.zoom.us.
- Log in with your p number (without @brookes.ac.uk) and Brookes password.
- Click Settings from the left-hand sidebar.
- Next to Waiting Room (appears second in the list) click the toggle on the right so it turns from grey to blue.
That’s it. Now, when you are scheduling a meeting, the waiting room will be enabled by default.
How to customise the waiting room
By default the waiting room will display:
- The meeting ID
- The phrase “Please wait, the meeting host will let you in soon”.
- The title of your meeting as you typed it when you scheduled the meeting.
Zoom allows you to change the second phrase above and also add a short description/message (maximum 400 characters) as well as to add the Oxford Brookes University logo.
To customise the waiting room:
- Go to brookes.zoom.us.
- Log in with your p number (without @brookes.ac.uk) and Brookes password.
- Click Settings from the left-hand sidebar.
- Below to Waiting Room (appears second in the list) click Customise waiting room.
- Click the pencil icon on the right of “Please wait, the meeting host will let you in soon.” and change it to Please wait, the teaching session will begin shortly or similar.
- (Optional) Click on LOGO+ and upload an image of the Oxford Brookes University logo. You can download an image with the logo below in the article attachments.
- Click Add waiting room description and write a short message for your students, for example: While waiting: 1) open the Moodle page for this course and go to the content for Week X, 2) Open a blank document or use a notebook to make notes during the session, 3) Please also set your webcam ON for this session. When you enter the meeting, make sure that the camera icon doesn’t have a red diagonal line. This is much appreciated by your fellow students and tutors.
- Then click the tick below the message you typed to save it.
- Once you are happy with how the waiting room looks, click Close (bottom right) and your changes will be saved automatically. There is no save button.
That’s it. Your students will see your message while they are waiting for you to start the meeting.

Help your students learn Zoom before you start teaching.
While the waiting room is great to show quick messages and reminders to students while they are waiting for you to start the meeting in Zoom, new students may also need some pointers on how to use Zoom and familiarise themselves with the interface right before the live session starts. You can easily do this by adding our Zoom template to your lecture slides. Available for PowerPoint and Google Slides.
How to disable the waiting room for individual meetings
In the instructions above, we saw how to enable the waiting room for all meetings by default. But if you schedule a meeting for which the waiting room shouldn’t appear, you can disable the waiting room by unticking the relevant box in the meeting scheduler, as shown below:
- Click Schedule a new meeting.
- Untick the box next to Waiting Room.
- Scroll down and click Save.
What the waiting room will look like to students
When students open the link to join a teaching session that has the waiting room enabled, they will be presented with the message below.

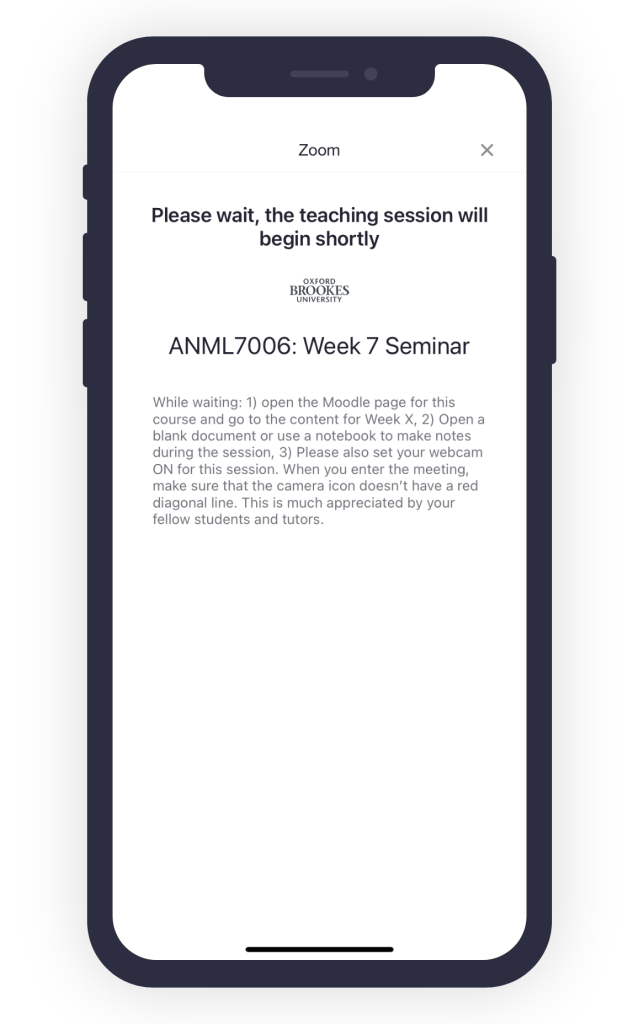
(click on images to enlarge)
After you admit students to the waiting room, the message above will disappear and students will enter the meeting automatically.
How to admit students that are in the waiting room
Once you are ready to start your teaching session, you may want to wait for a few minutes for students to arrive in the waiting room before you admit them into the meeting. This will save you time, because you won’t have to admit students one by one.
- Click on Participants from bottom of the Zoom window.
- At the top right you will see a list of students who are in the waiting room.
- Click Admit all to admit all students into the meeting.