All the individual teaching sessions that appear automatically within the Attendance activity have been configured to be accessible with a QR code and a password to allow students to register their attendance quickly.
Note: QR codes and passwords are randomly generated by Moodle and are unique for each session.
You will need to display the QR code and password to students in the classroom anytime during your session for them to be able to register their attendance:
- Make sure that the projector in the room is turned on and the computer screen is projected.
- Open Moodle and navigate to the relevant module.
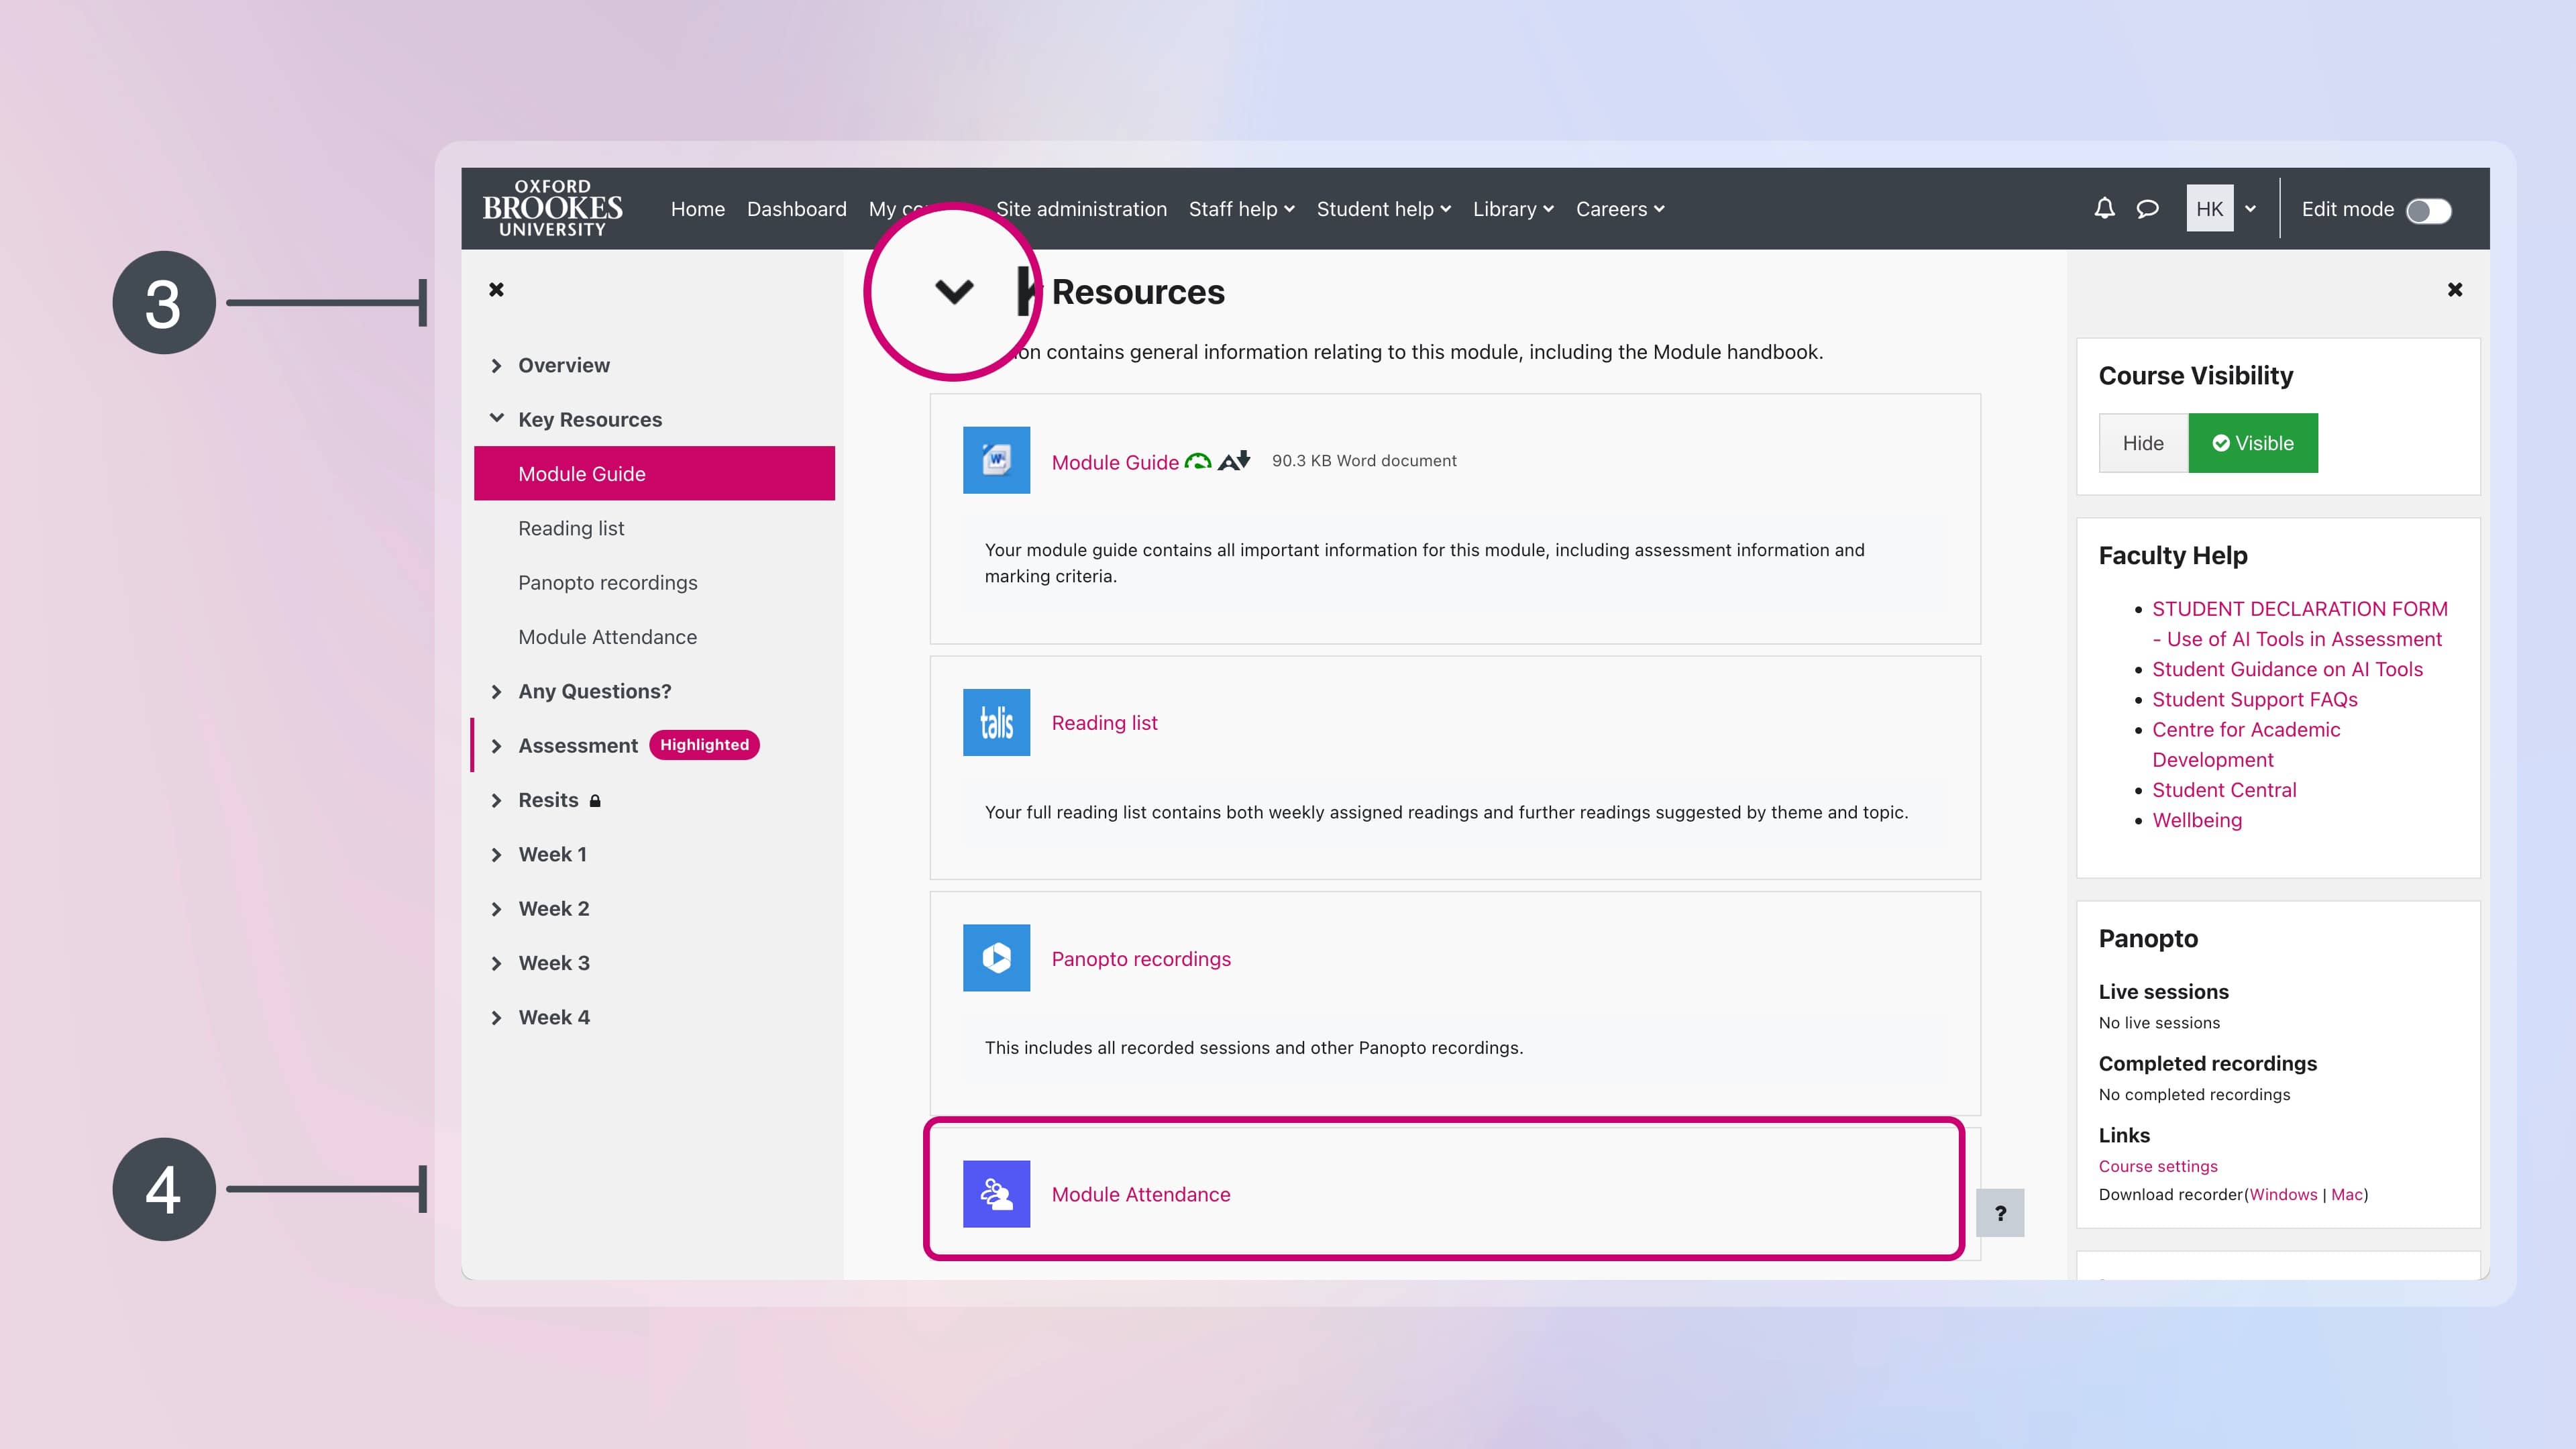
- Expand the Key Resources section if it’s not already expanded.
- Click on Module Attendance.
- Click All top right and locate the session for which you wish to capture attendance.
- Once you locate the relevant session, click the QR code icon on the right side, in the Actions column.

- A new tab will open that will display the QR code and password to students.

That’s it! We have sent separate instructions (opens in new tab) to students with what to do once you display the QR code and password on the projector screen.
Important
– You can start displaying the QR code and password to students from 15 minutes prior to the start time of the session.
– You can display the QR code and password on the projector screen anytime during the session.
– Moodle will allow students to record their attendance only during the timetabled session. Outside the timetabled times of each session, only teaching staff involved in each module can register or amend attendance on behalf of students.
– If students don’t record their attendance using the methods described in the student guidance, Moodle will automatically set their attendance status to ‘Absent’ when the timetabled session finishes.