This article describes how to use Google’s Appointment slots. Google has a new feature called Appointment schedules – you can use it now, and it will fully replace Appointment slots in July 2024. From July, the Appointment slots booking pages will no longer be available. We encourage you to explore and familiarise yourself with Appointment schedules. See: How do I create an Appointment schedule in Google Calendar?
With Google Calendar Appointment slots, it is possible to set up a block of time to advertise when you are available. This time can then be split into smaller blocks of time, each for a fixed duration which can then be reserved by other people, perfect for booking one-to-one appointments with your students.
Create a block of appointments
- Go to Google Calendar.
- Click on Create to create an event.

- In the pop-up window, complete the details for the appointment slots:
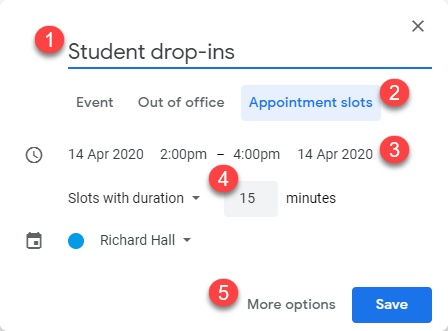
Give each of the Appointment slots a suitable name (1, above). Click on the Appointment slots tab (2) and then select a time-frame (3) for when the Appointment slots will be made available. Select the duration for each Appointment slot (4) and, finally click on More options (5).
The pop-up will expand to reveal more configuration options:
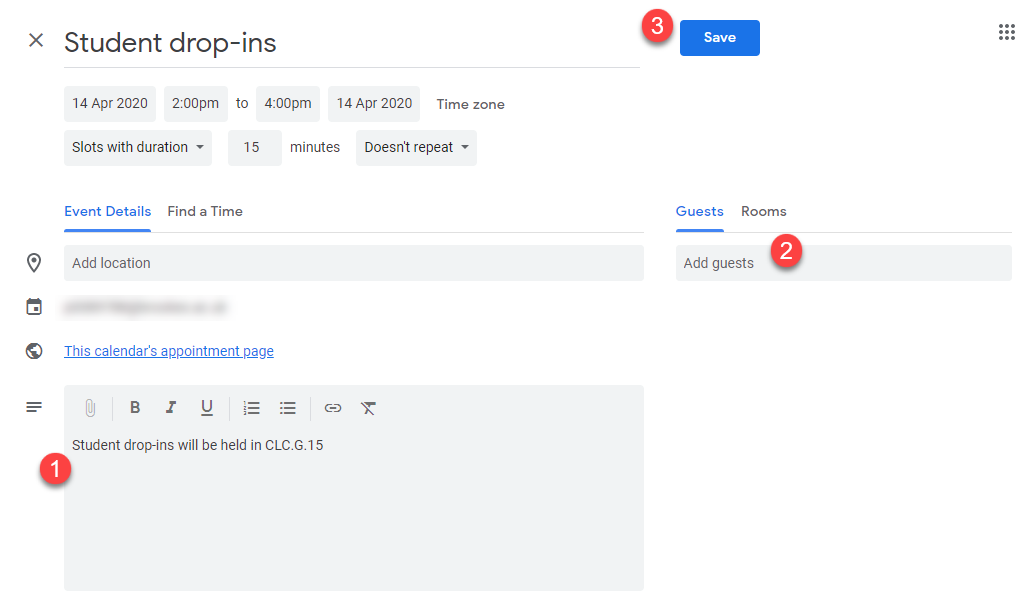
- You may wish to enter a description (1, above) for the appointments; for example, the location for the drop-ins.
- Finally click on Save (3).